
How to Draft the Princess Coat
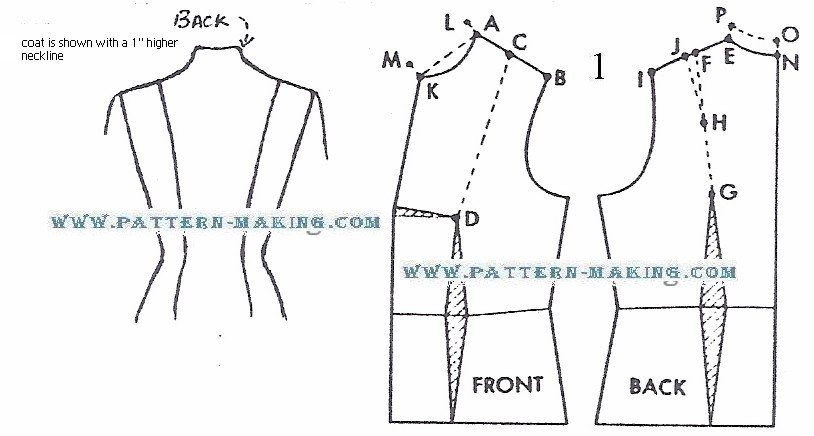
Draft of coat 1) using the coat foundation as a guide, divide front into two parts as follows: a to b – equals front shoulder a to c – equals half of shoulder c to d – draw straight line from point c to top of dart, divide back into two parts as follows: e to f – equals a to c on front shoulder f to g – draw straight line from point f to top of dart f to h – equals half of line f-g i to j – equals b to c on front shoulder j to h – connect for a 1” higher neckline, draft as follows:
Front a to k – draw a straight line from a to k a to l – 1”. square from line a-k at a to m – 1”. square from line a-k at k. then draw a curved line from l to m, parallel to the neckline, as shown in diagram 2. .
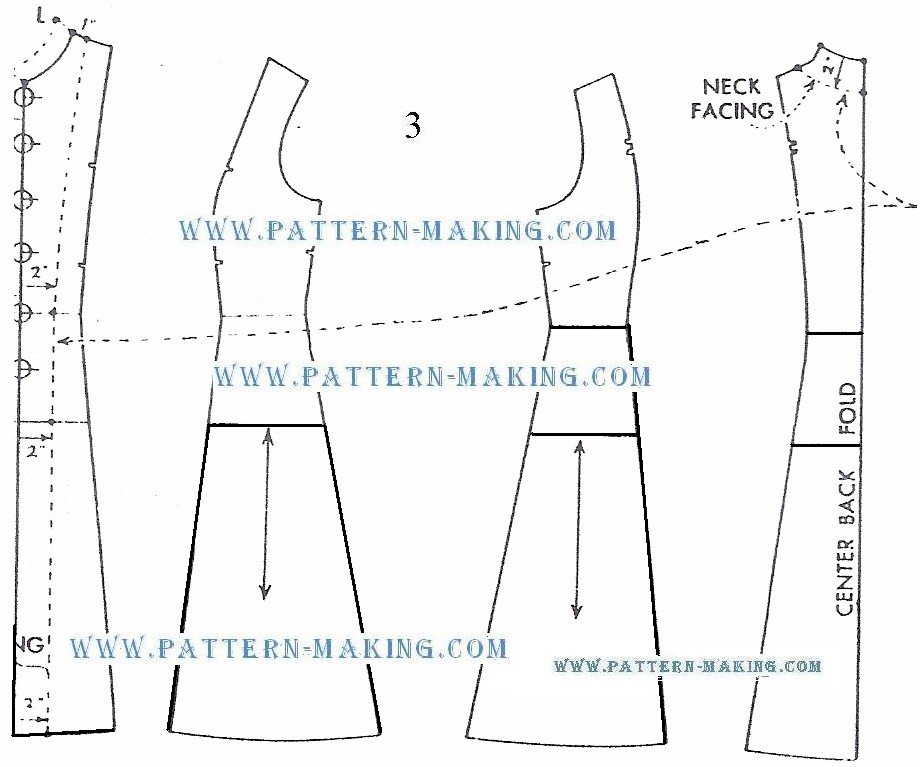
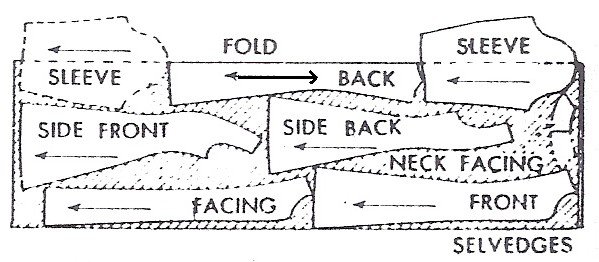
Back n to o – 1”. continue center back line up, n to o. e to p – 1”. be sure that the distance from p to o equals e to n, less 1/2″; then draw a curved line from e to p, parallel to neckline. 2) slash front from shoulder c to point d, then close up front dart as illustrated, continue lines down below hip line to required length, for grain lines, mark arrows on side sections by squaring from the hip line. 3) for overlap on front, add to center front, as shown by dotted line; then mark position for buttons and buttonholes. make facing sections for front and neck,. the cutting diagram below shows how to lay the pattern pieces of size 14 or 16 on 54” nap material


Comments are closed.